Kindly contact us via email info@mof.com.sg or whatsapp (click on below) to tailor make a program for you, your company, club or school. We do that weekly at affordable prices for all groups of people! There are basic and advanced programs, small or larger groups, one-off activities or weekly customized programs etc. etc.
info@ministryoffootball.com.sg
https://api.whatsapp.com/send?phone=6592799006
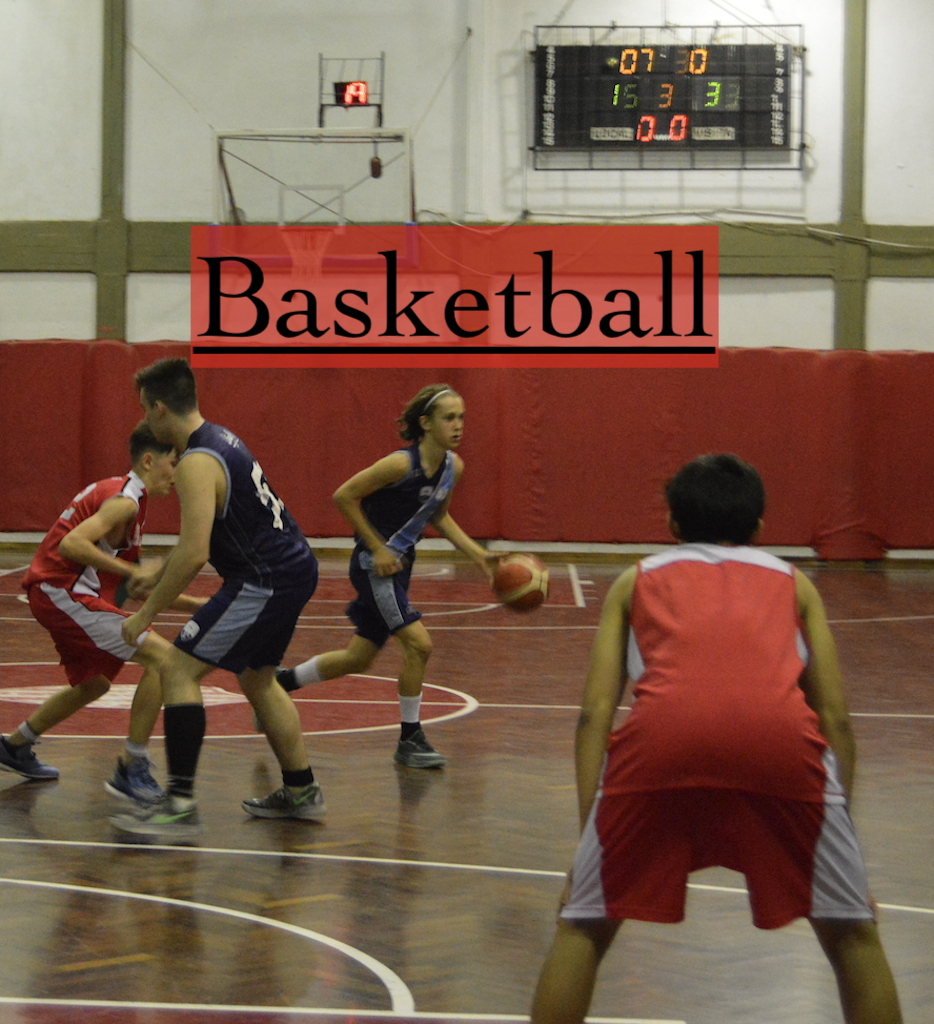
Contact us at for more information ! The below gives you an idea of what our program will be like!
—–
a guide from:
https://www.usab.com/youth/questions-and-answers/introduction-to-ball-handling-and-dribbling.aspx
Introductory Level
BALL HANDLING & DRIBBLING
GENERAL OVERVIEW: Ball-handling and dribbling are of paramount importance. These two skills allow the basketball to be advanced legally throughout the court of play. At the Introductory Level, ball-handling and dribbling take on the most basic form, allowing players to become familiar with the basketball.
SKILL 1
HOW TO HOLD A BASKETBALL
• Teach young players to hold the basketball with two hands, one on each side of the basketball.
• Players should spread their fingers, with their thumbs pointed up at waist level.
• Give young players a sense of confidence handling the basketball.
POINTS OF EMPHASIS
• Slight knee bend.
• Strong grip on each side of basketball.
• Head up.
• Spread fingers, thumbs up.
SKILL 2
FAMILIARITY WITH THE BASKETBALL
• In this skill, the player will become acquainted with the basketball by moving it from hand to hand, controlling it through all movements.
• It is important to ensure that the player is confident handling the basketball while remaining stationary.
• Once players become consistent with this movement, they can begin to move the basketball with greater speed from hand to hand.
• Have the player create a popping sound with the basketball against the hand as speed increases.
POINTS OF EMPHASIS
• Slight knee bend.
• Control of basketball from hand to hand.
• Head up.
• Spread fingers, thumbs up.
SKILL 3
TRIPLE-THREAT POSITION
Players who have become acquainted with the basketball are able to hold and move the basketball correctly. As soon as this occurs at the Introductory Level, it is important to introduce the concept of proper basketball positioning. This particular position is known as the “triple threat” stance, which got its name from the idea that when players first receive the basketball, they are a “threat” in three different ways on the court: dribbling, passing, and shooting. Every aspect of basketball, from an offensive standpoint, centers around this stance.
• This skill can be taught as a group where each player has a basketball.
• Following an explanation and demonstration by the coach, players can hold the triple-threat position while coaches make proper adjustments to the stance.
• Players should be in a balanced basketball stance with the basketball just above the waist.
• Hand placement, introduced earlier, should be such that a shot can be taken from the position.
• Hands should resemble a large, spread out “T” as formed with the thumbs.
• Later in the level, as players improve, it is important to emphasize using the pads of the fingers to hold the basketball.
POINTS OF EMPHASIS
• Balanced basketball position.
• Basketball at waist level of shooting hand.
• Hands positioned properly to shoot (“T” formation).
• Foot on same side of shooting hand positioned slightly in front of other foot.
• Head up.
SKILL 4
STATIONARY BALL-HANDLING:
THE FIRST DRIBBLE
At this level, dribbling the basketball for the first time can be an exciting moment. Teaching proper technique from the beginning is a critical element to instilling confidence in the player. Confidence determines a player’s desire to continue playing the game.
• To teach the proper technique of dribbling, players will start in the triple-threat position, with the basketball placed at the waist, on the side of the player’s shooting hand.
• The basketball should be dribbled in a controlled manner, rather than “slapped” at.
• The hand will push through the basketball with wrist movement (similar to a follow-through in shooting).
• Once the basketball returns from the ground to waist level, the player’s hand will stop the basketball and begin the process of pushing downward through the basketball again. At this level, players should begin working on the non-dominant hand as well.
• Coaches can instruct players to dribble a certain number of times, then catch the basketball in a triple-threat position, keeping track of how many times this is completed properly. Challenge players to do better than their own previous “record” each time. Fun, individual games such as these will keep the players engaged and enjoying the process.
• Later in the level, as players improve, they should be encouraged to use their finger pads to control the basketball while dribbling. This is an important concept to introduce, as the way that the basketball rests in the hands is consistent for ball-handling, dribbling, passing, receiving, and shooting. Once the technique is learned, it is important for players to learn how to control the dribble so that it stays at or below the waist level, while they keep their heads up.
POINTS OF EMPHASIS
• Balanced basketball position throughout. the entire process of the dribble.
• Controlled dribbling (no slapping!).
• Hand pushes through the basketball, downward wrist movement.
• Use both hands equally.
• Later in level: use finger pads to control basketball.
• Later in level: dribble no higher than waist level.
• Later in level: head up.
SKILL 5
DRIBBLING TO ADVANCE THE BASKETBALL
This is the first step in learning how to advance the basketball up the floor using the dribble. It is recommended to begin the process while walking, progressing to a jog, and finishing with a sprint.
DRILL: DRIBBLING IN A LINEAR PATH
Begin by teaching players how to dribble in a linear path. To make sure players are traveling in a straight line, coaches may use the painted lines on a gymnasium floor.
• Coaches will have players start in a triple-threat position, with the basketball placed at the waist, on the side of the player’s shooting hand.
• Players should begin walking in a straight line while dribbling the basketball with their shooting hand.
• Players will need to adjust their hand positioning so that it is placed slightly behind the top of the basketball to account for the forward motion. If players keep their hands directly on top of the basketball, the basketball will not travel with them.
• The hand placement will be different based on the speed the player is traveling. Exploration will help players become familiar and comfortable with proper hand placement as they progress.
• Encourage players to dribble with their heads up by having players call out the number of fingers a coach is holding up at the other end of the floor. Further, players should be encouraged to keep the basketball at or below waist level while dribbling.
• The same dribbling concepts taught previously should be reinforced in this drill.
POINTS OF EMPHASIS
• Controlled dribbling (no slapping).
• Hand placement on basketball.
• Hand pushes through the basketball; downward wrist movement.
• Use both hands equally.
• Dribble no higher than the waist.
• Head up.
DEFENSIVE PRINCIPLES
GENERAL OVERVIEW: At this level, due to the physical and psychological development of young players, teaching defense on the basketball is neither applicable nor recommended. Place emphasis on gaining confidence with the basketball, rather than defending it. For reference, however, the defensive stance is first introduced to this level in the section entitled Footwork and Body Control.
INTRODUCTORY LEVEL
FOOTWORK AND BODY CONTROL
GENERAL OVERVIEW: Footwork and body control are important at all skill levels, but should be emphasized especially at this level for the younger player. Footwork and body control are the foundation for all skills taught in basketball.
SKILL 1
STOPPING AND LANDING
Coaches should teach players to stop and land with good basketball position for proper balance. The knees should be slightly bent, the head should be up, the hands should be above the waist, and the head should balance at a midpoint between the knees.
POINTS OF EMPHASIS
• Slight knee bend.
• Feet wider than the shoulders.
• Head up.
SKILL 2
PIVOTING
This skill teaches pivoting for the young player.
• To make a pivot, pick one foot that will not move forward or backward; it will only spin. This foot is now ‘planted’ and becomes the pivot foot.
• The other foot can move so that the body may swivel and turn accordingly.
RUNNING, PIVOTING, AND BODY CONTROL
Here, the young player will become acquainted with running properly, stopping and landing, and learning how to pivot. In this skill, do not be concerned with the direction of the pivot.
• The stopping and landing position from Skill 1 above is necessary to perform the pivot.
• Make the pivot with one foot turning, and push off with the other foot so the body turns 180 degrees.
• After the pivot, players should begin to run in a direction specified by the coach. When running, players’ arms should be bent such that the forearm and the upper arm form a 90-degree angle. Remind players that the faster the arms move, the faster the player runs.
• Coaches should select a spot on the floor as a target for the players. Once they reach that spot, instruct them to perform a jump stop while maintaining good balance.
• Make sure players use proper form through the duration of the run.
POINTS OF EMPHASIS
• Slight knee bend.
• Feet wider than the shoulders.
• Head up.
• Pivot on one foot turning the body 180 degrees.
• Arms at a 90-degree angle.
• Jump stop with good balance.
DEFENSIVE PRINCIPLES
GENERAL OVERVIEW: At this level, due to the physical and psychological development of young players, only stance and initial movement of the body are introduced. Additionally, no offensive players are used; the only focus should be on the footwork and body control needed on defense.
SKILL 1
PROPER STANCE
The proper defensive stance should be introduced at this level. This will give the young defender the ability to move in all directions.
• A player’s feet should be set wider than the shoulders.
• The hands should be above waist level.
• The chin should be up, and the head should be positioned above the knees and not leaning forward.
POINTS OF EMPHASIS
• Back should be straight, chin up.
• Toes pointed straight.
• Hands above the waist.
• Slight knee bend.
DEFENSIVE PRINCIPLES
GENERAL OVERVIEW: At this level, due to the physical and psychological development of young players, only stance and initial movement of the body are introduced. Additionally, no offensive players are used; the only focus should be on the footwork and body control needed on defense.
SKILL 2
INTRODUCING INITIAL LATERAL MOVEMENT
Introducing movement to the young defensive player should be a slow process, making sure the footwork is executed correctly. Emphasizing the proper basketball stance or position is essential to ensure that movement can be done quickly and with body control.
• Remind players to use the stance described in Skill 1 above.
• Once in the proper stance, instruct players to move in a particular direction. Since this is defensive movement, make sure players are sliding, not crossing their feet or running sideways.
• Encourage players to move the foot nearest to the direction they are sliding first, and then push off with the other foot. Their feet should not come together after completing the slide.
• Feet should be pointed in the direction of the slide.
POINTS OF EMPHASIS
• Hands above the waist.
• Slight knee bend.
• Point the foot in the direction of the slide.
• Push with the opposite foot.
• Do not bring feet together after the slide.
INTRODUCTORY LEVEL
PASSING AND RECEIVING
OFFENSIVE PRINCIPLES: PASSING
GENERAL OVERVIEW: Passing and receiving are important abilities to develop. As with ball-handling and dribbling, these two skills allow the basketball to be advanced legally throughout the court of play. At the Introductory Level, passing and receiving take on the most basic form.
SKILL 1
BOUNCE PASS TO COACH
Once the player learns how to hold the basketball properly (see Introductory Ball Handling and Dribbling), the player can begin learning how to pass the basketball.
Begin with the player standing in relatively close proximity to the target until the player is comfortable with the skill.
Standing with a slight bend in the knee (or in triple-threat position), hold the basketball at waist level with two hands, one on each side of the basketball. The thumbs should be pointed upward.
Taking a step toward the target, which can be either a coach or a wall (not a teammate initially), the player will push through the basketball with both hands equally.
Encourage players to step into the pass with one foot, while keeping the pivot foot stationary. They should end with their thumbs pointing to the ground. Some refer to this motion as emptying a bottle of water.
• The basketball should bounce three-quarters of the distance between the passer and the target, but do not instruct players about this initially.
• Rather, select a spot or line on the floor in front of the players that, when hit with the basketball, will cause it to bounce up to the target successfully.
• Instruct players to try to hit the chosen spot or line with the basketball until they are comfortable enough to gauge an appropriate distance for themselves.
• Emphasizing that players pass from waist level and push through the basketball is crucial, as many beginners will try to pass the basketball from over the head.
• Hold the position at the end of the pass, holding the follow-through (similar to shooting).
POINTS OF EMPHASIS
• Slight knee bend.
• Thumbs up to thumbs down (empty bottle of water).
• Step into pass toward target.
• Push through pass from waist level.
• Hit line on floor, three-quarters of the distance to the target.
• Hold follow-through.
Drill 2: Two-Hand Chest Pass
Initial player positioning is similar to the positioning described above.
The player should begin with a slight bend in the knee, holding the basketball at waist level with two hands, one on each side of the basketball, and the thumbs pointing upward.
The player will then take a step toward the coach or target, push through the basketball with both hands equally, and pass the basketball in the air to the target.
The thumbs will end downward, creating a backspin on the basketball in flight.
Encourage players to step into the pass with one foot, while keeping the pivot foot stationary.
POINTS OF EMPHASIS
• Slight knee bend.
• Thumbs up to thumbs down (empty bottle of water).
• Step into pass toward receiver.
• Push through the pass from waist level.
• Straight trajectory, no lob.
• Hold follow-through.
SKILL 2
BOUNCE PASS TO TEAMMATE
As players improve, they will start to use proper passing techniques on a consistent basis. Once this happens, players can begin learning to make bounce passes to a teammate, instead of just to a coach or a wall.
The player passing the basketball should begin in triple threat position, facing a teammate, and should complete the two-hand bounce pass introduced above with the teammate as the target.
The teammate receiving the basketball should provide a two hand target around waist level for the pass to arrive. This player should catch the basketball on a two-foot jump stop, and immediately establish a triple-threat position.
Players will then switch passing and receiving roles.
At this point, players can also begin to communicate with one another, calling for the basketball and vocalizing to whom the basketball is being passed.
POINTS OF EMPHASIS
• Triple-threat position to start and finish.
• Step into pass, toward receiver.
• Push pass from waist level (strong passes as skill is learned).
• Proper follow-through, toward line on floor.
• Receiver provides two-hand target, catches on jump stop.
Drill 2: One Hand Bounce Pass
Once players become comfortable with the two-hand bounce pass, advance to a one-hand bounce pass.
• The general fundamentals remain the same with the triple threat position, momentum, and footwork stepping toward the target.
• Hand positioning on the basketball will be slightly different. The hand completing the pass will relocate from the side of the basketball to directly behind the basketball, with the wrist flexed backward, creating a T-formation with the thumbs.
• The opposite hand, or guide hand, will remain on the side of the basketball for control.
• Players will step forward and push through the basketball with the hand behind the basketball, pushing four fingers toward the floor, pointing the fingers directly at the floor during the follow-through.
• Encourage players to use both hands to pass, while stepping into the pass with one foot, keeping the pivot foot stationary.
• Players receiving the basketball should maintain the same fundamentals described above.
POINTS OF EMPHASIS
• Triple-threat position to start and finish.
• Step into pass, toward receiver.
• Push pass from waist level (strong passes as skill is learned).
• Proper follow-through, toward line on floor.
• Receiver provides two-hand target, catches on jump stop.
SKILL 3
CHEST PASS TO TEAMMATE
As players improve, they can begin learning to make chest passes to a teammate.
Drill 1: Two Handed Chest Pass
The mechanics of the two-hand chest pass are similar to those of the two-hand bounce pass described above.
Begin in triple-threat position, facing a teammate, with appropriate distance between the two. This allows for a successful chest pass to be completed with two hands while maintaining proper technique.
Again, the teammate receiving the basketball should provide a two-hand target around waist level for the pass to arrive. This player should catch the basketball on a two-foot jump stop, and immediately establish triple-threat position.
Encourage communication between the two players.
POINTS OF EMPHASIS
• Triple-threat position to start and finish.
• Step into pass, toward receiver.
• Push pass from waist level (strong passes as skill is learned, no lobs).
• Proper follow-through, toward teammate.
• Receiver provide two-hand target, catch on jump stop.
Drill 2: One-Hand Chest Pass
As for the one-hand chest pass, the main difference from the twohand chest pass is hand placement on the basketball.
The hand that is making the pass will shift directly behind the basketball, flexing the wrist backward, with the guide hand remaining on the side, creating a T-formation with the thumbs.
While stepping toward the target, push through the basketball, snapping the wrist to create a follow-through pointed directly at the teammate.
• Encourage players to make strong passes without lobs when first learning to pass. Especially at this young age, develop players to use both hands equally, stepping into the pass with one foot while keeping the pivot foot stationary.
POINTS OF EMPHASIS
• Triple-threat position to start and finish.
• Step into pass, toward receiver.
• Push pass from waist level (strong passes as skill is learned, no lobs).
• Proper follow-through, toward teammate.
• Receiver provide two-hand target, catch on jump stop.
OFFENSIVE PRINCIPLES: RECEIVING
SKILL 1
INDIVIDUAL RECEIVING
Players should be taught to catch the basketball with their hands, rather than to corral it with their chest and arms. The younger players’ instinct will be to corral the basketball, rather than extend their hands to catch it. It is important to correct this behavior before a bad habit or improper technique is formed.
DRILL 1: CATCH OWN DRIBBLE
• To begin the process, have players dribble the basketball, working on catching the basketball at the peak of the dribble.
• Players should work on catching the basketball with two hands, one on each side of the basketball.
• Once the basketball is caught, players’ heads should be up, and they should be positioned as discussed in “Skill 1 — How to Hold a Basketball” of the section entitled Ball Handling and Dribbling, included in this level.
• Encourage players to control the basketball (hold it instead of immediately dribbling again) with the catch. They should use a strong grip, keeping their fingers spread and their thumbs up.
POINTS OF EMPHASIS
• Reinforce positioning from “How to Hold a Basketball.”
• Catch with two hands at peak of dribble.
• Control basketball on catch (strong grip, spread fingers, thumbs up).
DRILL 2: CATCH OWN PASS OFF WALL
Once players become comfortable catching their own dribble, have them catch a return pass off of the wall.
• Players should complete the initial pass against the wall so that they control the velocity of the basketball, making the experience less intimidating to start.
• Begin with the player making a two-hand bounce pass against the wall, sending the basketball back toward the player.
• The basketball will bounce once first, then the player can work on catching the basketball.
• When learning to catch a pass, players should create a “W” with their hands; the middle point of the “W” is formed with the thumbs. The “W” will encourage players to position their hands closer together, while also gaining an understanding that the hands are positioned behind the basketball in order to stop its momentum.
• Once the player gains confidence with this skill, the player may advance to making a two-hand chest pass against the wall. This will send a stronger bounce pass back to the player.
• Continue working with players to ensure they are using the “W” to catch and receive the basketball with control.
POINTS OF EMPHASIS
• Reinforce positioning from “How to Hold a Basketball.”
• Catch with two hands.
• Control basketball on catch (strong grip, spread fingers, thumbs up).
• Make a “W” with hands, spread fingers.
SKILL 3
CATCH BOUNCE PASS AND CHEST PASS FROM TEAMMATE
After players become comfortable catching passes from a coach, they may begin working with a teammate to continue developing passing and receiving skills.
• The teammate receiving the basketball should provide a two-hand “W” target for the pass at waist level. This player should catch the basketball on a two-foot jump stop, and immediately establish a triple-threat position.
• As the skill is learned, players can begin to vary the tempo used to pass back and forth to one another.
• Further, teammates can begin communicating to each other as they pass and receive the basketball.
• Finally, coaches should work with players to move their bodies in front of the basketball if it is passed outside of the frame of the body. This is the beginning stage of teaching players to move to meet a pass, and these are great habits to begin developing at a young stage.
POINTS OF EMPHASIS
• Slight knee bend.
• Create “W” target with hands.
• Catch with two hands.
• Control basketball on catch.
• Triple-threat position after catch.
• Later in level: varying tempo.
• Later in level: player communication.
• Later in level: move to meet pass.
DEFENDING THE REBOUNDER
GENERAL OVERVIEW: At this level, due to the physical and psychological development of young players, defending the pass is neither applicable nor recommended. Place an emphasis on building players’ confidence with the basics of passing and receiving the basketball before introducing defense.
INTRODUCTORY LEVEL
SHOOTING GENERAL OVERVIEW: Shooting is a necessary fundamental to learn, as the objective of the game is to score the basketball. This may be the most important level for the proper development of a player’s shooting mechanics. If improper habits are formed early in a player’s development, they can be more difficult to correct later on. As a result, it is critical to emphasize proper shooting techniques at this stage, regardless of a player’s strength or size.
SKILL 1
BASIC SHOOTING MECHANICS
SUMMARY: A basketball is not used in this skill to ensure strong habits are created prior to introducing one. The concepts below can be practiced in a group, facing an instructor, or circled around the three-point arc on a basketball floor. To teach the mechanics of shooting, it can be helpful to use the acronym, B.E.E.F., which stands for balance, elbow, eyes, and follow-through.
BALANCE
• To begin, feet should be comfortably set at or just wider than shoulder width apart. If feet are placed more narrowly, the player will likely be off-balance.
• Toes should be facing forward, toward the basket or the instructor, with the same foot as the shooting hand positioned just ahead of the other foot.
• The proper distance “ahead” can be ensured by having players bring their feet together. The toe of the back foot should fit comfortably in the indentation of the arch of the front foot. Make sure players move their feet back to shoulder width apart after this foot alignment is determined.
• There should be a slight bend at the knee, the back should be straight, and the head should be over or slightly ahead of the rear end. If the head is too far forward, the player will not be properly balanced.
• Shoulders should be parallel, or “square” to the basket or instructor.
• All of these elements combined will allow the shooter to be on balance. Coaches can slightly nudge the shoulders of players to test their balance while in this stance.
ELBOW
• At the initial stage of the shot, the elbow of the shooting arm should be next to the side of the player where the basketball will eventually be held in the “shooter’s pocket.” The elbow should not be out to the side at this stage because it will not allow for a smooth lift through the process of the shot.
• As the player begins the shooting process by raising the arm, the elbow should remain in alignment with the toe and knee of the shooting hand. The elbow will be in a “U,” not “V” shape as the shooting hand is lifted.
• It is important to stress that the elbow should remain vertical. If the elbow is allowed to “chicken wing” outward, the shot will be more of a push. Once a basketball is introduced later, this improper technique would cause a flat trajectory as the basketball goes through the air, rather than an arched one.
EYES
• Although this skill does not involve using a basketball, it is important to instruct players as if it did, in order to prepare them for future lessons. When players use a basketball in later skills, many will want to watch its flight through the air. This is not ideal, as it can impact the mechanics of the shot and leave the basketball short.
• Once the shooting motion begins, players’ eyes should be focused and locked on the rim of the basketball hoop. There is much discussion on whether the best focal point is the front, middle, or back of the rim, but the exact location is not the most important — the consistency is. Once players pick a place on which to focus, they should look at the same place for every shot.
• Emphasize that players should keep their eyes on the spot that they select for a few seconds after completing the shooting motion. This is a key habit to form without a basketball because once one is introduced, players will already be accustomed to focusing on their selected spot from the time the shooting motion begins, until the basketball goes through the hoop.
FOLLOW-THROUGH
• The follow-through may be the most important element in learning to shoot the basketball. Consistency is the key for all elements of the shot, but especially for the follow-through. As the “basketball” is in flight, instruct players to hold a strong and proper follow-through position for a few seconds to allow the “basketball” to reach the rim.
• As for technical placement of the shooting arm, the elbow should end just in front of the ear to create the correct amount of arc on the shot, and the wrist should snap forward and down, which will create a backspin once a basketball is used. The backspin is important, as it will give the basketball a chance to bounce on the rim, resulting in what many call a “shooter’s roll.”
• When the wrist is snapped for the follow-through, a player’s first four fingers should end up pointing toward the floor. The middle finger will be the last finger that touches the basketball during the follow-through process. For players who learn from visual cues, it may help to have them pretend they are standing on their tiptoes trying to grab a cookie out of a jar above their head.
• Young players should freeze in this position, as if they are posing for a picture for a few seconds after the shooting motion ends to let the “basketball” hit the rim. At this point, the shot is finished.
POINTS OF EMPHASIS
• Focus on details of mechanics without a basketball.
• Use B.E.E.F. concepts.
• Create good habits from the beginning by breaking down each element.
SKILL 2
SHOOTING FROM A POSITION ON THE KNEES
A basketball should be introduced at this point in the level, but players will not be working with a basketball hoop quite yet.
DRILL 1: ON ONE KNEE, SHOOTING TO SELF WITH ONE HAND
• To begin developing a comfort level with the mechanics of the shot, isolate the upper body by having players start on their knees with a basketball. Begin teaching the form with the shooting hand only, as the guide hand can be challenging at this age due to the strength and size of young players.
• Start with the player on one knee, with a straight back, and squared to a target. The knee that players put their weight on should be the one opposite their shooting hand. In other words, players who shoot with their right hand should kneel on their left, with the right knee out in front of them. Coaches should watch players carefully to ensure they are not rocking in any direction throughout this exercise.
• In this position, players will hold the basketball out in front of them at waist level, with the shooting hand underneath the basketball and the guide hand behind the back. The basketball should be placed on the pads of the fingers, allowing a little bit of light to show between the basketball and the thumb.
• Once players have the appropriate grip, instruct them to move the basketball from the waist up to shoulder level, turning the wrist in the process so their fingers end up pointing backward. This helps players work on movement control and teaches the importance of using finger pads.
• The elbow should now be in a “U” shape, parallel to the knee of the shooting hand, with the wrist cocked backward. Make sure players maintain correct basketball positioning, so that a trace of light can be seen through the basketball. Pause briefly at this position to make any corrections before allowing players to begin the upward shooting motion.
• At the end of the shooting motion, the elbow should be placed slightly ahead of the ear and the middle finger should guide the follow-through, ending with four fingers pointed toward the floor as if grabbing a cookie out of a jar above the head.
• The eyes should remain on the target until the basketball hits the ground. Ideally, if the follow through creates the correct backspin, the basketball will spin back to the shooter after bouncing off of the ground so that the shooter can grab the basketball without having to move.
• Coaches should be aware that players just learning this skill will not be accurate with the trajectory of the basketball. Ensure players do not hit themselves in the head, as many times the basketball will travel directly upward.
DRILL 2: ON ONE KNEE, SHOOTING TO SELF WITH TWO HANDS
• As players become comfortable with one hand, they can begin using two hands by incorporating the guide hand. The “guide hand” should remain just that, a guide.
• At this level, players have a tendency to want to shoot with two hands, pushing the basketball rather than shooting it. The guide hand should be placed on the side of the basketball, creating a wide spread out “T” with the thumbs on the basketball.
• Have the players repeat the exercise above, adding the guide hand. This hand will will remain on the side of the basketball to assist with control as the player raises the basketball from the waist to the head.
• At this point, the guide hand will stop and allow the shooting hand to complete the follow-through. However, the guide hand is part of the follow-through and should remain around head-level until the basketball hits the ground. It is important to encourage the proper use of the guide hand prior to shooting on a basket to avoid creating bad habits.
• Once players use their guide hand properly from one knee, instruct them to begin on both knees, seated with their rear end on their heels. From this position, they should perform the same arm movements, and rise from the seated position to a kneeling, upright position as they shoot the basketball. This will help simulate the motion of the shot from a standing position.
POINTS OF EMPHASIS
• Focus on details of mechanics.
• Control basketball when raising from waist to head level.
• Ensure proper technique using one hand before moving to two.
SKILL 3
SHOOTING FROM A STANDING POSITION
DRILL 1: SHOOTING TO SELF WITH ONE HAND
• The feet should be properly spaced and balanced as discussed in Skill 1 above, and the shoulders should remain squared toward a target.
• Players should hold the basketball at the waist with the shooting hand under the basketball. Begin the same process as detailed above, ending with a solid follow-through.
• Introduce the use of the legs in conjunction with the upper body at this point. Initially, players should not jump; instead, they should rise slightly onto the balls of their feet.
• Using the legs will result in a stronger shot, and allow there to be more of an arc in the basketball’s trajectory through the air than when players are on their knees.
• As players improve, provide an exact location on the wall directly in front of them that they should try to hit with consistency. pointing backward. This helps players work on movement control and teaches the importance of using finger pads.
DRILL 2: SHOOTING TO SELF WITH TWO HANDS
• Once the player becomes comfortable with one hand, begin using both hands. Again, focus on the guide hand being just a guide.
• As players improve, challenge them to have the basketball hit the same spot on the floor, creating consistency in the shot.
• An appropriate backspin will cause the basketball to bounce directly back to the player without having to move to catch it.
• As this skill involves both hands on the basketball, coaches should feel free to combine it with other skills, such as Receiving. For example, as the basketball travels back toward the player after a shot attempt, encourage the player to receive the basketball on a two foot hop, placing the basketball in the shooting pocket in a triple-threat position. From there, continue with another two-hand shot attempt.
POINTS OF EMPHASIS
• Focus on details of mechanics from beginning to end.
• Legs should work in conjunction with upper body.
• Create solid comfort level with one hand before moving to two.
DRILL 3: SHOOTING AGAINST A WALL WITH ONE HAND
• Next, have players begin shooting the basketball toward a target. Initially, use a wall for this purpose.
• Instruct players to stand approximately five feet away, facing the wall. Make sure they are squared to the wall and in a balanced stance. Players should use the same motion learned above to shoot the basketball to themselves.
• Coaches should be aware that once targets are introduced, players often focus on hitting the target at the expense of proper technique. Take care to reinforce correct mechanics at this stage.
• One of the more important mechanics is the follow-through. Remind players that the elbow should be just in front of the ear, creating the appropriate arched path as the basketball goes through the air.
• As players improve, provide an exact location on the wall directly in front of them that they should try to hit with consistency.
DRILL 4: SHOOTING AGAINST A WALL WITH TWO HANDS
• Once the player becomes comfortable with one hand, begin using both hands. Again, focus on the guide hand being just a guide.
• As players improve, challenge them to have the basketball hit the same spot on the floor, creating consistency in the shot.
• An appropriate backspin will cause the basketball to bounce directly back to the player without having to move to catch it.
• As this skill involves both hands on the basketball, coaches should feel free to combine it with other skills, such as Receiving. For example, as the basketball travels back toward the player after a shot attempt, encourage the player to receive the basketball on a two foot hop, placing the basketball in the shooting pocket in a triple-threat position. From there, continue with another two-hand shot attempt.
POINTS OF EMPHASIS
• Focus on details of mechanics from beginning to end.
• Focus on proper follow-through.
• Encourage consistency as comfort level progresses.
SKILL 4
SHOOTING FROM A POSITION ON THE GROUND
This skill is recommended if a player struggles with the mechanics of the follow-through. When a player is laying on the ground, it isolates the shooting arm and allows the player to focus solely on this aspect of the shot.
• Instruct the player to lay on the ground, facing up. A coach or instructor should stand above the player.
• The basketball should be placed on the pads of the player’s fingers and held above the head with the shooting hand, only. The arm should be slightly bent, creating a “U” with the elbow. Make sure players keep the elbow tucked into the side of the body.
• From this position, have the player begin the shooting motion. The wrist should snap, resulting in four fingers pointed toward the floor. The basketball should travel straight up toward the coach and return to the hand.
• With this vantage point, the player can easily see the rotation of the basketball, making sure backspin has been created.
• Once the player becomes comfortable with one hand, begin using both hands. Again, focus on the guide hand being just a guide.
POINTS OF EMPHASIS
• Basketball placement on finger pads.
• “U” created by elbow.
• Snap wrist, four fingers to the floor.
• Backspin.
SKILL 5
SHOOTING ON A BASKETBALL HOOP
Once the player has established a solid set of mechanics for a shot, the basketball hoop may be introduced. At first, it may be beneficial to use a hoop that is lower than a standard basketball hoop, especially if the player does not have the strength or size to shoot properly on a ten-foot basket.
DRILL 1: SHOOTING ON A BASKETBALL HOOP WITH ONE HAND
• Using only the shooting arm, begin working through the mechanics detailed in drills above.
• The goal should continue to be creating good habits, not compromising form to make a basket.
• Encourage players to keep their eyes focused on the same spot on the rim for each shot attempt.
DRILL 1: SHOOTING ON A BASKETBALL HOOP
WITH ONE HAND
• Once the player becomes comfortable with one hand, begin using both hands. Continue reminding players that the guide hand is just a guide.
• Further, make sure players use their upper and lower bodies together. This will be important later in the growth of the shooter to create range on the shot.
POINTS OF EMPHASIS
• Focus on details of mechanics from beginning to end.
• Encourage proper mechanics rather than made shots.
• Upper & lower body working together.
INTRODUCTORY LEVEL
TEAM DEFENSIVE CONCEPTS
GENERAL OVERVIEW: Once your players understand and can properly execute the individual defensive skills, the coach can begin organizing them together into defensive team concepts. The primary defensive objective in basketball is to stop the opponent from scoring. At this level, we are concerned with proper stance and the ability to guard one offensive player.
SKILL 1
UNDERSTAND DEFENDING
ONE OFFENSIVE PLAYER
• This level will stress the importance of just guarding or defending one offensive player with and without the ball.
• The help side defensive concept is not introduced at this level as the young player needs to develop on ball defense in a one on one situation.
• Start out with the defender working to be in a position between the offensive player and the basket in a one on one situation.
• Start the offensive player at the top of the key without the basketball. Rule for the offensive player is move and try to get to the baseline between the lane lines without getting touched by the defender.
• Progress to the coach who will dribble the ball from the top of the key to the basket with the defender in a good stance staying in front of the coach
• The drill then can be done 2 on 2 or 3 on 3 where each of the offensive players have a ball starting at a spot on the court. One offensive player starts his dribble to the basket with the defender staying between the ball and the basket. The next offensive player will start on coaches command.
• Extend the drills to full court – have the offensive player without the ball use v cuts starting at one baseline and go to the opposite baseline. The defender stays an arm length from the offensive player using drop steps when the offensive player changes direction.
POINTS OF EMPHASIS
• When playing the one on one tag game, the defender should keep his distance with the offensive player in front until he decides to make a tag.
• The defender needs to keep a good stance when trying to stay in front of the offensive player.
• The defender should keep one foot ahead of the other foot when in a stance guarding the dribbler.
• The defender should try to keep the hand down to discourage the cross over dribble – same hand down as the top foot.
• Have the rule for the defender when playing the offensive player with the ball not reaching for the ball and keeping an arm’s length distance.
• Eyes should be kept on the waist of the offensive player and not on the ball or the head of the offensive player.
• The offensive player must stay on one third of the courtwhen moving with v cuts the full length of the court.
INTRODUCTORY LEVEL
TEAM OFFENSIVE CONCEPTS
GENERAL OVERVIEW: Once players understand and can execute the individual skills explained in this level, coaches may begin providing instruction on offensive tactics. The primary objective on offense, scoring, is achieved most easily when the basketball is moved effectively between the players on the court. At this level, coaches should focus on teaching players how to be aware of where their teammates are on the court during various offensive scenarios.
SKILL 1
PROPER FLOOR AND PLAYER AWARENESS
The most important concept when coordinating an offensive attack is to maintain balance on the court. To do this, it is crucial that players learn how to be aware of where their teammates are around them.
• At this level, start with three players standing inside the lane.
• On command, the players must spread out on the half court line, making sure they are aware of where their teammates are located. As players improve, increase the number on the court to four, and then to five players at a time.
• The progression for proper floor and player awareness is to have the players switch places with a teammate on command by the coach.
• Once the players are spread out on the half court, the coach will pass the basketball to one player and the players must be able to pass the basketball to their teammates easily if they are properly spread out.
POINTS OF EMPHASIS
• The players must be 12 feet apart from each other which is the width of the foul lane.
• Have the players throw air passes to each other and then bounce passes while they are in the proper floor positions.
• When the players switch positions on the court, the player who just passed should communicate the change of position with the teammate by a raised hand or by calling change.
• The coach can call out a certain number of passes and then the player who has the basketball will shoot.
SKILL 2
RECOGNIZING SPOTS ON THE FLOOR
• Once the players are aware of where their teammates are located, the coach can teach the areas each player is located on the half court – baseline, wing, high post, low post, top of key.
• Set a basketball down in each of the five areas on the floor – baseline, wing, top of key, low post, high post. Starting at the baseline with five players, each player runs to an area and stands next to the basketball. Repeat until all players have had a chance to run to all spots.
• Next, using the same starting process, the coach will call out certain areas of the court and players must run to fill those spot. The player will pick up the basketball and get into triple threat position. For this part of the drill players will not shoot the ball. Coaches should start by calling out one spot and then work up to calling out all five spots in succession.
• The same drill can start at half court with five lines. In this variation, the front player in each line will fill in one of the areas on the floor when prompted by the coach.
• For this drill, the player will sprint to the area called, pick up the basketball, and shoot it. It would be best to use an additional coach to serve as a rebounder to keep the drill moving.
• A final variation of the drill at this level would incorporate passing. Once prompted, the first player in each of the five lines would sprint to an area but not pick up the basketball. The coach would then call out one of the spots. The player in that spot would pick up the ball and get into triple threat position. The coach would then call out a spot for that player to pass the basketball to. The player who receives the pass would then take a shot.
POINTS OF EMPHASIS
• Insist that players remain in the spot and not in-between spots.
• Remind all players to get into triple threat position, facing the basket at all times.
SKILL 3
INBOUNDING THE BASKETBALL
• When inbounding the basketball at this level, the passer must make a pass to the player moving to the basketball. At this level, players moving away from the basketball should not be passed to.
• To avoid crowding, the players should have balanced spacing. Encourage two players moving to the basketball and two players moving away from the basketball.
• Emphasize movement by having players move and exchange places with a player in another area. This encourages teamwork and spacing to become an open receiver for the passer.
• Teach the passer to use a prompt to start the motion of the other players. Slapping the ball or shouting “go” are great cues to start.
POINTS OF EMPHASIS
• Slap the ball or shout “go” to start motion.
• Keep proper spacing, avoid crowding.
• Receiving players must come to the ball.
• All players should have hands ready to receive.
SKILL 4
SPACING
• It is important for young players to understand that spacing on the court is important for team basketball.
• Coaches may begin teaching this concept to players at the Introductory Level by using markers (cones or discs) placed on the court. The markers should be spread out and spaced approximately 12 to 15 feet apart. Instruct players to sprint to a marker on command.
• Continue the drill with the players sprinting to a new marker on command of the coach.
• For variation, give players a marker and start them lined up at the baseline. The first player in line will place the marker anywhere on the court and stand by it. The next player in line will space their marker about 12 to 15 feet from the first marker. Follow until all players are completed.
• To show the importance of spacing have players pass a ball to the nearest teammate. Next, have players try to pass a ball to a teammate much further away. Highlight that shorter passes are easier, and longer passes are more difficult.
POINTS OF EMPHASIS
• Demonstrate to players a 12 to 15 foot distance.
• Encourage sprinting to spots.
• Emphasize short passes, discourage long passes
SKILL 5
TRANSITION FROM DEFENSE TO OFFENSE
• At this level, transition from defense to offense is about proper spacing and knowing the spots on the floor.
• Place cones at the top of the key at both end to mark off 5 distinct areas of the court – 2 outside lanes, 2 inside lanes and the middle lane. 4 cones should be set up to show the five lanes.
• Start players in five lines at one end of the court.
Without the basketball, and on command of the coach, have the first player in each line sprint to the opposite baseline while remaining in their lane.
• Once completed, the players should rotate lines so that each player gets a turn running through each lane. The drill is complete when all the players have run each of the lanes.
• Next, perform the same drill but add basketballs. The middle lane dribbles the basketball while the outside two lanes pass a basketball back and forth while sprinting in their lanes.
• Next, have the middle lane pass the basketball back and forth with the inside lane players while sprinting down the court. At the same time, the outside two players will dribble a basketball.
• Progress the drill with three players inside the middle lane running in a circle with their hands ready. The coach will pass the basketball to one of the players. This player will then dribble the basketball in the middle lane while the other two players sprint the outside two lanes to the other end. If appropriate, the sequence can end with a pass for a layup.
• Continue this drill using five players. One of the inside two player will sprint to the low post area and the other will sprint to the high post area. The dribbler should make a pass to the outside lane player who will then pass to one of the post players up ahead of the sequence.
• The last phase in this transition should be the middle player dribbling to the top of the key while the other 4 run in their lanes. Allow the dribbler to make a choice on who to pass to
• Progress the drill until all players have had the opportunity to play all of the lanes.
POINTS OF EMPHASIS
• Always keep players without the ball slightly ahead of the ball.
• Encourage all players to sprint with hands ready and eyes on the ball.
• Keep proper spacing between players
• Emphasize short accurate passes, discourage long passes and excessive dribbling.
• Rotate players through each lane multiple times, disregarding positions, height or ability.