Introduction & Guidelines from https://olympiashooting.com/about-rifle-shooting/
Kindly contact us via email info@mof.com.sg or whatsapp (click on below) to tailor make a program for you, your company, club or school. We do that weekly at affordable prices for all groups of people! There are basic and advanced programs, small or larger groups, one-off activities or weekly customized programs etc. etc.
Contact us at for more information ! The below gives you an idea of what our program will be like!
AIR RIFLE SHOOTING TECHNIQUE
The shooting technique consists of four elements:
Shooting position
Aiming
Pulling the trigger
Breathing
Shooting position
POSITION IN GENERAL
The shooting position is very important for achieving high scores. In order for a shooter to achieve a high score, he should have a position that enables him to aim and trigger correctly. First of all, a good position should provide stability as much as possible so that the shooter’s body/rifle system moves as little as possible while aiming and triggering. Besides stability, the position should also make it possible for a shooter to feel comfortable in accordance with the number of shots at the competitions and, thus, be less physically and mentally tired.
No matter how many variants of a single position are there, basically every position should provide:
a necessary level of balance of the shooter – rifle system with the least tension within the muscular system
the optimal conditions for the function of vision and balance
for the normal function of the inner organs, correct blood circulation and
the needs of the position
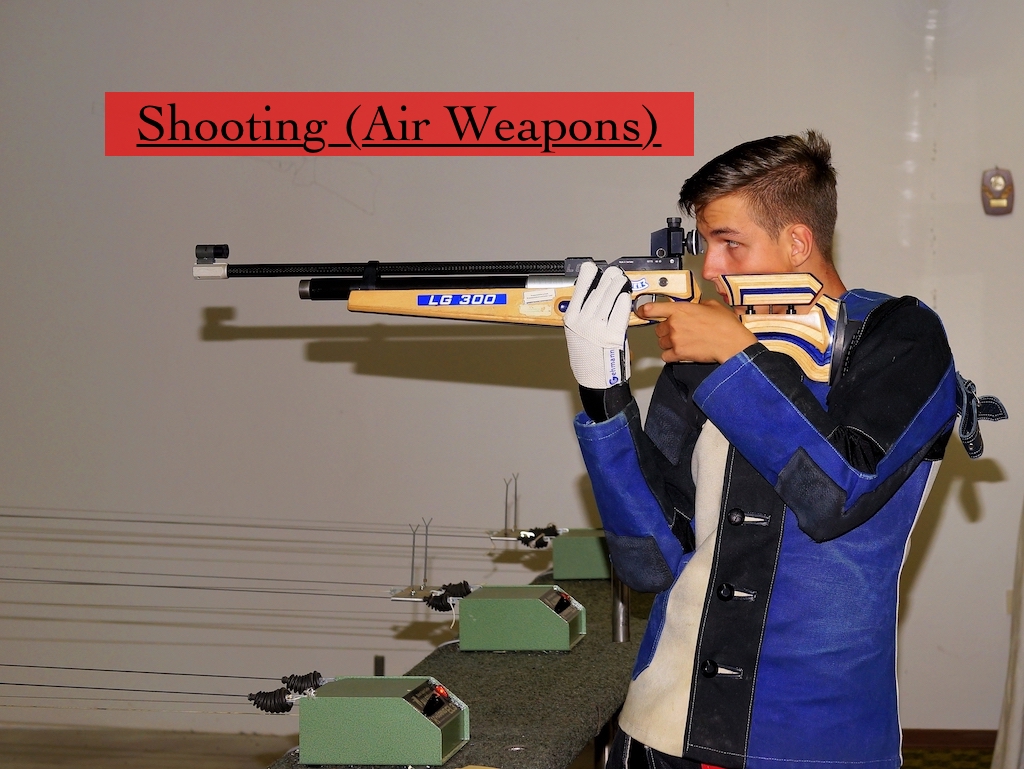
STANDING POSITION
The standing position is the most difficult for shooting because the support area of the body is small – only the feet and the area between them and the center of gravity of the system shooter-rifle are raised. The tension of the supporting muscles is considerable as well. As the most unstable of the shooting positions, it demands from the shooter an exceptional sense of balance and muscle control. Muscles should be relatively relaxed, but on the other hand, must give the necessary stability to the position so that the rifle moves as little as possible. The balance of the rifle and the shooter-rifle system has to be such so that the weight of the rifle is transferred through bones and ligaments to the ground.
The standing position elements (right-handed shooters)
Feet, legs and pelvis
The position of feet should provide for the maximum stability, and it also serves for the correction of the shooting position concerning the target.
The feet are placed approximately shoulder width apart or more while the left foot is parallel with firing line and right toes are pointed out slightly for optimum balance and control.
The weight is distributed to both legs equally or a little towards the left foot. The stability of the rifle depends on the weight balance at the feet. If there is too much weight on the left foot, the rifle drops horizontally, and if there is too much weight at the back, the rifle drops vertically.
The position of the feet also serves for the correction of the shooting position concerning the target. In general, the left foot is fixed and almost normal to the shooting line while the right foot is used for corrections as follows: by widening the position, the barrel goes up, by narrowing the position, the barrel goes down, forward – the barrel goes to the left, backward – the barrel goes to the right. By rotating the right toes round the heels to the left – the barrel goes to the left or to the right – the barrel goes to the right.
The legs are straight with minimal tension of the muscles that are required for the firmness of the position. It is good for the shooter whilst he is in the position to close his eyes and concentrate on the feet and legs. This is the easiest way to find the position where the pressure is equally balanced on the toes and heels and to relax the muscles of the legs.
The position of pelvis should be in the line of shooting. Hips are forward towards the target. If the pelvis is turned aside, unequal pressure on the feet occurs and the back muscles are tense which disturbs the stability of the position and concentration of the shooter because of the movement of the rifle and the muscles get tired quicker.
Body
The body is tilted rearward, all bending occurs above the waist. This should locate the rifle above the center of the support area and provide stability to the position. The purpose of assuming this position is to put the center of gravity of the rifle closer to the medium line of the body, which decreases the tension of the muscles caused by holding the rifle. The back is bent rearward and the body pointed to the right to allow the maximum involvement of the sinews and ligaments, the transfer of the center of gravity of the shooter-rifle system to the spine, and, thus, considerably release the muscles that provide the stability of the body in the area of the waist and hips.
The left arm is directly under the rifle.
The left elbow is leaned against the left hip or slightly to the right.
The rifle is placed on the fist of the left hand so that the wrist is straight and the hand is relaxed and the complete weight of the rifle is transferred to the bones – by the upper arm to the hip and further to the legs. Putting the elbow on the stomach or to the left brings instability of the position and unnecessary tension of the muscles in order to keep the rifle on the target. The wrist is straight and the left forearm has to be exactly under the rifle, that is, to follow the axis of the rifle. The balance of the rifle has to be on the rifle support and the hand. If it is in front of the hand, there is a slow, but unstoppable movement of the barrel since the COG of the rifle is forward. If it is behind the hand, the pressure is weaker on the hand and there is an uncontrollable jump of the barrel during triggering.
The shooter touches, holds and leans the rifle on the four points: butt plate, pistol grip, cheek-piece, and palm rest. The basic principle for the acquisition of the best conditions for a good shot is for the rifle and the shooter to make contact as best as possible. Under these conditions, the jump of the rifle during pulling the trigger is less and the effect of disturbance during triggering is minimal.
The butt plate is leaned against the right upper arm between the biceps and the shoulder. It should lean at least 5-10cm on the shoulder. This prevents turning of the rifle and its jump aside during triggering.
The right shoulder is relaxed.
The right arm is raised between 30 and 40 degrees, which allows better fitting of the butt plate on the shoulder.
The right hand grasps moderately to firmly the pistol grip of the rifle. The hold of the right hand should be firm enough, but it also should allow for correct triggering. This is a problem for many shooters because the hard grip of the pistol grip blocks the index finger, and when it is weak it causes an uncontrolled jump of the rifle.
The rifle is straight or slightly canted to the left, which allows the correct position of the head and goes directly over the chest, as close to the left shoulder as possible, but it must not touch the left side of the chest (ISSF Rules).
The head is straight without bending so that the cheek can lean on the cheek-piece of the stock without any effort.
Leaning the head on the butt has two functions: first it performs the additional control of the butt at the back. Second, the head has to be placed so that the eye is right in the line of aiming. When the head leans on the cheek-piece, the neck muscles have to be relaxed. It can cause the situation when the eye is not in the line of aiming. Raising the head or stronger pressure on the cheek-piece is not good. The head should normally lean on the cheek piece, and by adjusting the cheek piece vertically and laterally put the eye in the line of aiming.
Holding the rifle on the palm rest has various variants so that it is left to the shooter himself to choose what suits him best. At the beginning it is best to keep the rifle on the fist.
Some variants are:
On the fist;
Between the thumb and forefinger;
Between the forefinger and middle finger and the thumb behind.
The position variants depending on the body constitution:
Tall shooters have a narrower leg position and straighter body position;
Short shooters have a wider leg position and they are more bent rearward and to the right, the left hip is more forward;
Plump shooters are more bent rearward and the rifle is canted more to the left because of the right head position and placing of the rifle to the chest;
Shooters with long arms hold the left arm slightly forward.
A good standing position has to have the following condition: all the muscles of the left shoulder, hand and arm have to be relaxed in order to prevent shaking and movements during triggering.
Aiming
Aiming is the next very important element for the top scores achievement. Laymen say it’s a piece of cake. Place concentrically the target, ring and diopter and hit the centre. But, especially with beginners, the problem is to “catch” the black circle in the ring while the positions are not perfect and the rifle walks a lot.
How to aim
First, the shooter should be taught how to aim. He should be shown in a drawing how the sights stand in accordance with the black circle. He then should be given a rifle rested on the support to aim for himself and transfer the picture that he saw on the paper. When he adopts the way the sights stand concerning the target, he can practice aiming while in the position.
Head position
Place the cheek piece of the rifle so that the eye is in the sight line.
With top shooters, aiming is adopted in such a way that it is almost automatic. The shooter is mostly concentrated on triggering and then the aiming errors occur. After triggering, the shooter has to stay in the position for a couple of seconds and check, among other things, if the ring is in the middle of the diopter. Head movement before triggering is the most common error while aiming.
Choice of the ring size and blend
As a rule, the ring should be 1/3 larger than the black circle, but it is not always the case. Depending on the shooter’s versatility, the size of the ring varies. With the beginners the ring should be larger because the rifle walks more and then the shooter can’t concentrate on triggering because the black circle is not in the ring all the time and he has to “hunt” it. The rule applies for top shooters. The blend opening of the diopter has to allow the shooter to see the ring and the target clearly. When the opening is smaller, the black circle is visually enlarged and it merges into the ring. If the opening is too big, the right shape of the ring is lost and the shooter does not have the right picture how he aimed. When the blend opening is too big, head position errors are much larger.
Since the rifle moves all the time, the shooter has to learn to conduct aiming always to be from the same side and in the same way. In this way he will achieve automatism in aiming and reduce errors to the minimum.
It’s recommended to bring rifle from the top. This is the easiest way to coordinate breathing, aiming and triggering.
Aiming should be binocular (with both eyes open) for the following reasons:
It does not ask for additional effort, that is closing eyes, which is very important during the long shooting sessions, binocular vision sharpness is greater than monocular, since the impulses that come to both eyes cause greater excitement of the corresponding parts of the central nervous system and the exhaustion of brain cells is smaller since they operate under natural conditions, closing one eye influences partial closing of the other eye and, thus, influences the sharpness of vision.
Triggering
The technique of triggering has a great, often decisive, importance for the achievement of a good shot. First of all, triggering must not disturb the position of the rifle that is entered into the target, because of that the shooter has to know how to pull the trigger evenly. Second, triggering has to be performed during the breathing break in accordance with aiming, that is, when the sights and the black circle are concentric. As a result, in order to achieve a good shot, the shooter has to act – not separately, not isolated one from another, but mutually in accord.
Bringing these two elements together is necessary because the rifle during triggering is not still, but moves more or less, depending on the stability of the position. As a consequence of that, leveled sights stay in the middle of the target for a very short time, while the shooter has to pull the trigger evenly and end triggering. Since the movement of the rifle, with many, especially with not physically fit shooters, is in most cases an individual thing for each shooter, it is very difficult to foresee the time and duration of these short breaks of leveled sights concerning the black circle of the target.
The conditions for correct triggering
Since triggering has to be done so as not to disturb concentric sights, pulling the trigger has to be even. Even pulling the trigger raises the question of special demands for the index finger of the right hand. The quality of a shot mainly depends on it because the most precise and careful aiming will disturb by the smallest incorrect movement of the finger. In order for the index finger to perform this task without interrupting aiming, it is necessary, above all, to hold the rifle correctly and provide the suitable support that will allow correct triggering. Holding the pistol grip should be tight enough, but not too tight, because the effort of the palm muscles can cause unnecessary movements of the rifle. It is also needed to find such a position for the palm so that there is a clearance between the pistol grip and the index finger. Then the movement of the index finger during triggering will not cause any side pressures that could move the rifle and in that way disturb aiming, that is, disturb the line of aiming. In order to perform the correct triggering, it is necessary to pull the trigger with the first joint or the finger ball.
The trigger should be pulled straight back, so that the index finger moves parallel to the barrel axis. If the finger pulls the trigger from aside, that is, under the angle concerning the barrel axis, it could cause an increase of the weight of triggering and an uneven, jumping movement of the trigger causes by the angle and additional friction of the parts of the triggering mechanism. It also can disturb the level of sights and be the cause of a great discrepancy of shots from the centre of the target.
Although the pressure on the trigger should be applied evenly and gradually, it does not mean that it should be done slowly, but equally and without jerking. Triggering must not last longer than 1.5-2 seconds. However, just the skill of pulling the trigger is not enough for a good score. The second obligatory condition is that the action of the index finger while pulling the trigger is in accord with the correct breathing and aiming.
The ways of triggering
By the way of setting the mechanism, triggering can be divided into:
Triggering without the first leg – direct, and
Triggering with the first leg
By the way of pulling the trigger, triggering can be divided into:
Even
Gradual
Pulsating
Direct triggering is mainly used by well-trained shooters for whom the rifle fits well and the accord between aiming and triggering is brought almost to perfection.
Even triggering is used with young and not well-trained shooters who still cannot make a good balance with the rifle, and because of that the movement of the rifle is great, while the periods of calmness are very short. In these cases the shooter should, with no concern to the movement of the rifle, right after rough entering of the rifle into the target, start evenly to pull the trigger, trying to finish it until the size of the movement of the rifle increases as a result of the muscle tiredness.
Gradual triggering is applied on experience and well-trained shooters, who while shooting in the standing position, move the rifle considerably less and the periods of calming down, are quite longer. It means that the shooter pulls the trigger when the rifle shows vibrating movements and then calms down, and stops when the movement increases. When the swinging decreases, the shooter continues to pull the trigger, each time increasing the pressure, until it comes to firing.
It’s the most common way of triggering.
With pulsating way of triggering, the index finger is not still as with aiming during even and gradual triggering, but it constantly and evenly moves and periodically touches the trigger or withdraws and relaxes the other leg. At the most convenient moment for firing, the shooter by increased pressure manages the resistance of triggering.
The advantage of such a way of triggering lies in the fact that the shooter, by moving the index finger uninterruptedly and rhythmically, acquires psychological and nervous-muscular balance in the nervous processes of excitement and calming down, which allows a higher speed of reaction and coordination of movements.
As the adoption of the correct pulsating triggering is connected to important difficulties for whose management high practice is needed, it is recommended only to top shooters. Furthermore, during pulsating triggering there are some elements of “hunting” the convenient moment for firing a bullet, which makes possible jerks, as in the “hunt” for the ten.
Typical triggering errors
Triggering errors are mostly the following: incorrect hold of the pistol grip, not stopping breathing or incorrect breathing stop, prolonged triggering and “hunting” the ten. “Hunting” the ten causes the worst scores because it is regularly connected to trigger jerk. Prolonged triggering is a very complicated error that occurs for various reasons. Sometimes it occurs as a consequence of a very slow pulling of the trigger. This error inevitably leads to the loss of rifle balance, and causes tiredness of shooter’s eyes, so that he is deprived of the possibility to judge the position of the sight in connection to the target.
Breathing
Correct breathing and taking a breathing break is another element that influences the score and the continuity of good shots during the match.
It is very important that the shooter understands the importance of developing a deep breathing, diaphragmatic process that fills the entire lungs on the in-breath. Short breaths that raise the shoulders should be avoided. The deeper and slower the breathing process, the more effective the oxygen supply to the brain. A deep and rhytmic breathing process induces calming effects that improve concentration and levels of muscular tension.
After taking two or three deep breaths, the shooter should hold his breath without any difficulty for at least 20 seconds. This time will allow him to shoot between 8 and 10 seconds after assuming the appropriate position and aiming the sights on the target without reaching the critical moment of the shot breathless.
For taking deep breaths and better ventilation of lungs, the shooter has to learn how to breath by his stomach, that is, by moving the diaphragm towards the stomach and not by spreading the rib cage. Also an advantage of this way is less movment of the upper body and better stability of the position during breathing.
To practice this, the coach or the shooter himself puts his hand on the stomach and breaths in the way that only his hand moves, not the rib cage. The shooter should engage in physical training – running, swimming, bike riding, etc. to enlarge his lung capacity so that he can renew the oxygen in the lungs faster, and through this the concentration would also be at the higher level.